The following is a step by step procedure in using BLINQ.
1. Download the MSI from:
http://www.asp.net/sandbox/app_blinq.aspx?tabid=622.
For using BLINQ, May 2006 CTP of LINQ must be installed in your machine.
Refer Part I of the article for this.
3. Install the MSI in your system. By default, BLINQ gets installed in C:\Program Files\Microsoft ASP.NET\BLINQ.
4. Open Visual Studio 2005. On the File Menu, point to New and then click Web Site.
5. Under Visual Studio installed templates, select ASP.NET Web Site.
6. In the Location drop down list, select File System and give the path as C:\BLINQDemo and then click OK. This creates a new Web Applcation.
7. Now click Start, and then click Run. Type cmd in the Open box and then click OK.
8. In the command prompt type cd "\Program Files\Microsoft ASP.NET\Blinq" .
9. Now run the BLinq tool on the created Web Site by typing the following command, replacing Servername,UserName and Password accordingly. Also copy the same
to a single line before running the command. I have split it here for posting
purposes:
Blinq /t:c:\BLINQDemo /database:Northwind /vDir:BLINQDemo
/server:ServerName /user:UserName /password:Password
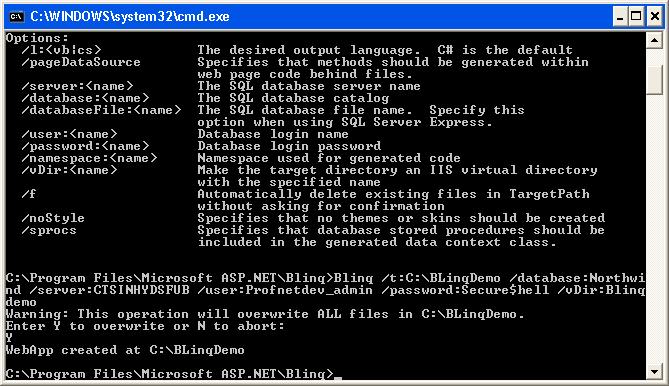
10. You will be prompted if your web site can be over written. Type Y and then press enter.
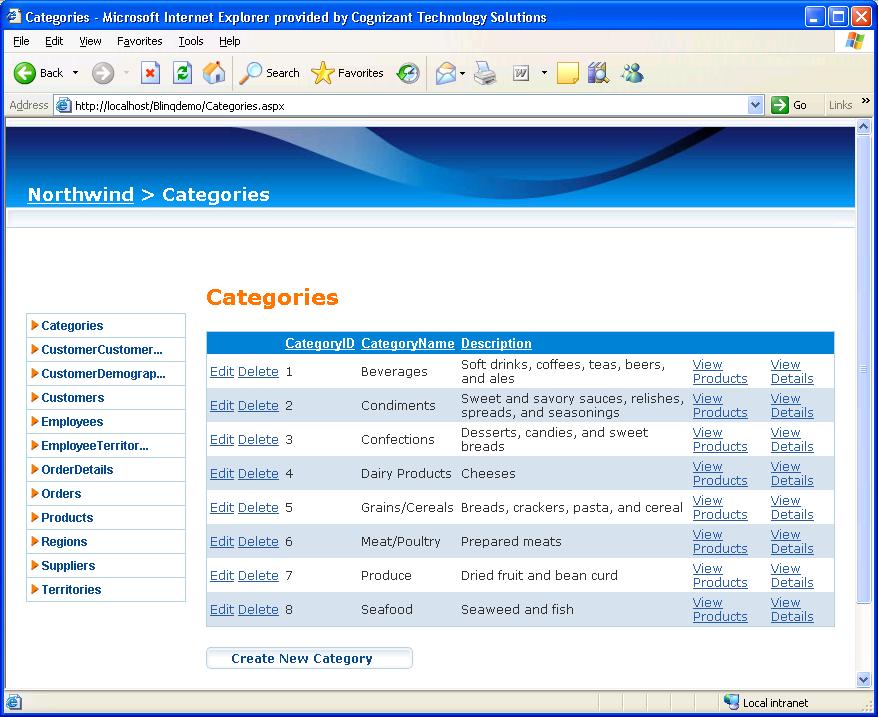
11. After successful creation, you will get a message WebApp created at C:\Blinqdemo.And the web site opens up at http://localhost/blinqdemo/categories.aspx, as shown below:

You will also be able to perform all Insert,Update,Delete, View (CRUD) options on the entire Database. The image below shows the Update,Delete and View options in Categories.
BLINQ is definitely an exciting tool for every developer. Let us wait for the next release of this tool, integrated with Visual Studio.
No comments:
Post a Comment